OK First of all I started off as you all should have seen in my lesson how I modelled the body. by initially creating the front and side planes of the blueprints I drew of the character. Then from here I chose a starting point to begin modelling.
As you can see in this image I began with the flack jacket, creating a plane and then manipulating the points to line up with the blueprint.
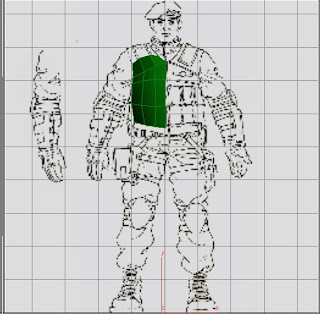
Now as you can see in the screen grab I am having trouble getting the displayed image on the blueprint to show at the correct resolution. If anyone can work out how to fix this I will give them a prize.
OK so following on from this I continued to use edge copy and vertex manipulation to shape the torso and the flak jacket. Like this. So the front half was pretty much blocked out.
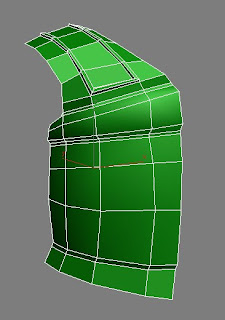
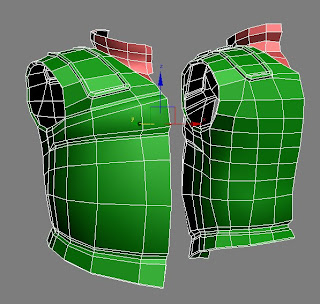
To get the back I just mirrored the front section then used soft selection to move the verteces into place. I also cut lots of unwanted edgeloops out as I shaped it.
Here are both the front and back sections complete with the collar section built in too.
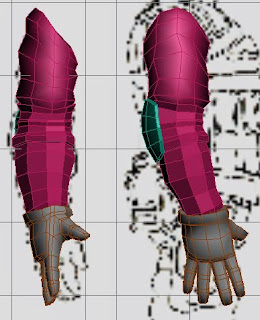
Next, using the vertical version of the arm I then started blocking the bicep out with a cylinder. I basically positioned the cylinder at the top creating the first loop of the upper arm then again using edge copy just began extruding the edges down to form the folds and shape of the sleeve. Once I got down to the elbow pad I jsut carried on extruding but didnt build the actual hard shell of the pad from this. I added that by using a sphere and shaping it to match the design.
I didnt add too much detail in the forearm section as I was going to let the normal map take most of the detail. He has a Hard forearm guard with indents and this is better achieved with a normal.
OK. from here I decided to start modelling the head as I had to get the head modelling into the lessons for the students so it was a perfect spot to get this in.
So, using my ugly mug as a guide I took some images front and side to use as my blueprint and again set things up in max on two planes.
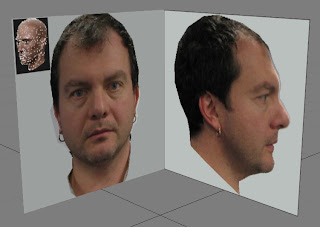
Then again finding a good starting point I creted a plane and began shaping and edge copying to start forming the head shape.
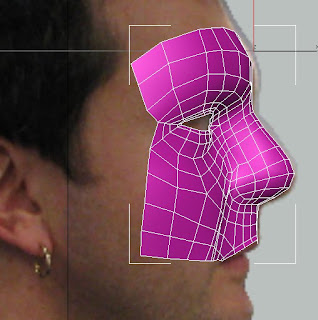
I usually start from the forehead and work out and down from there but I know alot of artists like to use the eye as a starting point. I guess its all in your own choice of where you want to start but either way you will get to the end somehow.
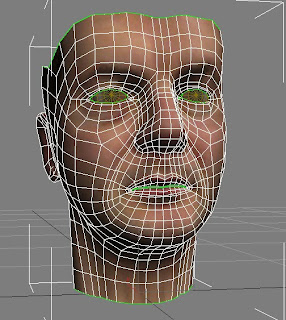
As you can see here I managed to get a good shape with the head and in the rendered image I was quite shuffed that it really did look like me. GOD HOW UGLY. To get a more natural look. Once I had mirrored the right side I used soft selection to offset the left eye and tweak some of the shapes. This created a more realistic and natural look as my head is so unsymetrical.
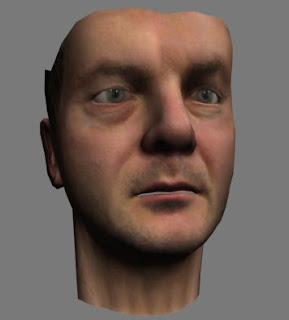
Once I was happy with the final head I merged it into my body scene and positioned it in correctly.
I then continued with the legs. This again was done similar to the arms by using and cylinder to start from and then edge copy down to form the folds and shapes of the legs.
Once I got down to the knees I mirrored over the shape I had to see if it was OK. I was going to have to totally rebuild one section as the legs werent symetrical. One side had a holster and the other a pack. So once I was happy with one side it would get tweaked after I flipped it over.
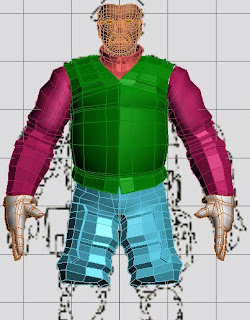
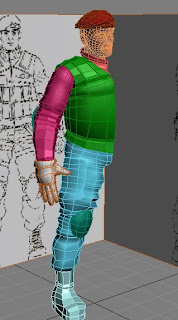
Then Finally once happy I mirrored everything over tweaked the bits I needed to get it asymetrical and Bobs your uncle and Kev's your aunt and he was done.
He still needs a few pouches and ammo packs on his Torso and belt but thats him pretty much done.
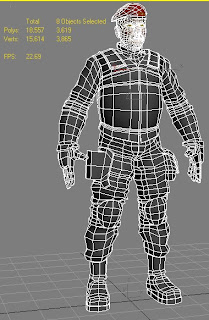
Also note in the image that the polygon count on the selected polygons are only 3619. So with a Polycount of 10,000 I have lots of room to play with if I wanted to add more detail but that can come later if needed.
So the next big job is going to be Unwrapping the UVW so I can get a UV layout and create a texture for him. I will be showin the students how to do this when they come back from their Xmas break but for now I hope they just get stuck in and experiment.
Well I hope this has been helpful. If you have any questions please dont hesitate to comment and I will see if I can answer.
This will probably be my last post till after Xmas so make sure you have a great time and get lotys of goodies and I will see you all in the new year.
Big hugs.
Dean :D
PS. He's watching so be good.
No comments:
Post a Comment